The Sunday Night Safety Net: Versioning Your Keyboard Firmware Before It Bites Back
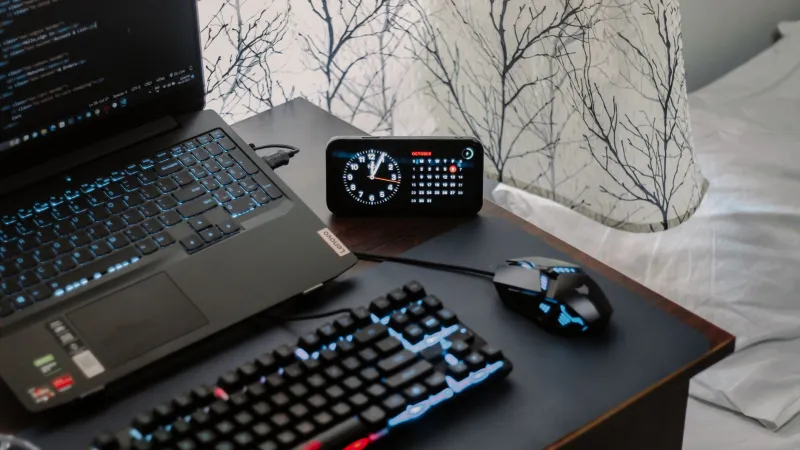
There's a specific kind of quiet that settles over a house on a Sunday evening. The roast tin is soaking, the bin needs putting out, and somewhere on the desk a keyboard that typed perfectly well this morning is now producing nothing but a column of the letter q. You flashed something. It went wrong. And the sinking feeling arrives right on cue: you don't have a copy of what used to be on there.
This piece is about making sure that never happens again. Not with hand-wringing, but with a folder, a text file and about fifteen minutes of admin you'll do once and thank yourself for later.
Why the firmware is always the thing nobody backs up
People are fastidious about photos and terrified of losing a phone. Meanwhile the actual work of a custom keyboard — the layout you spent three evenings refining, the layers, the tap-dance you finally got right, the encoder that only behaves with one particular bit of config — lives in a handful of text files you've never copied anywhere. If you built from a QMK fork, it might be sitting in a directory called qmk_firmware_old_2. If you use VIA, your layout may exist only in the browser's memory. If you're on ZMK, congratulations: you're already keeping it in a git repo, possibly without realising that's what's saving you.
Firmware is also the one part of a keyboard you generally cannot pull back off the chip once it's on there. Locked microcontrollers don't give up their contents on request. So the backup has to exist before the flash, not after. Grim, but simple.
The three things worth saving (and the fourth you'll forget)
Start with a single folder on whatever drive you actually back up, named with an ISO date so it sorts itself: 2026-11-13_kb-backup.
Inside, you want:
- The source.
keymap.c,config.h,rules.mk, the.jsonlayout from VIA, the.vilfrom Vial, or the.keymapand.dtsifiles from ZMK. If it's a split, save both halves' configs. - The artefact. The compiled
.hex,.binor.uf2that you know worked. Not the newest one — the one that was on the board when everything was fine. Name itworking_2026-09-02.uf2and stop renaming it. - The metadata. Board name, PCB revision (it's silkscreened on the board, and you'll need it), microcontroller, vendor, order number, purchase date. Two minutes now, two hours saved later.
- The fourth thing: the oddities. The resistor you swapped, the diode you bridged, the fact that the right half only pairs if you turn it on second. Nobody writes this down and everybody needs it six months later.
The build passport, or: one page that travels with the board
Keep a single A4 page. Print it. Fold it into the box, or tape it inside the case if there's room. On it:
- Board and revision, MCU, vendor, order number, date bought.
- Where the firmware lives (repo URL or folder path).
- Date and version of the last known-good flash.
- How to get into the bootloader — plainly, in words, because in a panic you will not remember whether it's a double-tap or a hold.
- Any hardware modifications.
- Your initials and a contact detail, in case the keyboard ever leaves the house without you.
That page is worth more than the keycaps when something goes sideways. It's also genuinely useful if you ever sell the board on — buyers love a paper trail, and it's the sort of courtesy that makes the UK second-hand market a nicer place.
The five-minute pre-flight before you flash
Before you open QMK Toolbox or drag a .uf2 across, run this in your head:
- Cable and port. A known-good data cable, straight into the machine, no hub, no dock. Half of all "bricked" boards are actually half of all bad cables.
- Power. Laptop on mains. Do not flash on a battery at 8%.
- Static. It's November, the heating is on and the air is dry. Touch something earthed before you touch the PCB.
- One tool at a time. Close VIA before you use QMK Toolbox, and vice versa. Two programs fighting over one serial port is a classic self-inflicted wound.
- Backup folder open. If you can't see the files, you haven't made the backup.
Getting into the bootloader, by chip
This is where most people stall. The routes are short, but they're not universal.
RP2040 boards — hold the BOOTSEL button while plugging in, then release. A drive appears; drop the .uf2 on it. No software required, which is why these are such a good first build.
AVR boards (the older Pro Micro crowd) — tap the reset button twice in quick succession. You get roughly eight seconds of bootloader window, so have the flash command ready before you press anything.
STM32 boards — usually a reset button plus a DFU mode, flashed via QMK Toolbox or dfu-util on Linux and macOS. On Windows this sometimes needs a driver dance; do that dance on a weekday, not at 9pm on a Sunday.
nRF52840 wireless boards — a double-tap of the reset button drops you into the bootloader, and the board appears as a USB drive. Single tap reboots, double tap flashes. Learn the difference now.
Anything else — there's a button on the back of the PCB, and it's usually labelled RESET. If there isn't, there's a pair of pads you can bridge with tweezers. Carefully.
When it's already gone wrong
Work through it in order, and don't skip steps because you're impatient.
First, does the computer see anything at all? On macOS, System Information under USB. On Windows, Device Manager. On Linux, lsusb. If the board enumerates, you're almost certainly recoverable and it's just a matter of putting it back into the bootloader.
Second, try the reset route again — and try a different cable, because it costs nothing.
Third, if you're on ZMK and the halves have stopped talking to each other, flash the settings-reset firmware first, then the real firmware. Nine times out of ten that's the whole fix, and it takes under a minute.
Fourth, if you're on QMK and the board types nonsense or refuses to be recognised, use the EEPROM clear option in QMK Toolbox before reflashing. Corrupted settings survive a reflash otherwise, and you'll chase your tail for an hour.
Fifth — and this one catches people out — if you're on VIA, your firmware may be entirely fine and the problem may be the layout JSON. Reload the saved file before you assume the worst.
What you should not do is start installing random drivers. Zadig and friends have their place, but they can also turn a solvable problem into a two-day one. Change one thing at a time.
The recovery ladder, UK edition
If the DIY route runs out:
A local keyboard meetup. There is almost certainly one within an hour of you, and someone there owns the right programmer and has flashed worse. Ask nicely, bring biscuits.
An independent keyboard builder. Many of the small UK makers who sell kits will take on a repair. Post the board properly — padded, tracked, insured — and photograph it before it goes in the box.
The vendor. Under the Consumer Rights Act 2015, goods must be of satisfactory quality, fit for purpose and as described; you have a 30-day short-term right to reject and, for the first six months, the burden of proof sits with the retailer. Custom firmware complicates the conversation rather than ending it, so be straight about what you did. Vendors respond far better to a clear account than to a vague one.
A repair café. Wonderful for a dodgy USB port or a reflow. Not the place for a firmware puzzle — that's a software problem wearing a hardware costume.
What to put in the email to the vendor
Keep it to a short, factual block: order number, board name and PCB revision, what firmware and version you flashed, what you used to flash it, what the board does now, what you've already tried, and whether it enumerates. Attach a photo. That's it. No essay, no apology, no speculation about the soldering.
And then, once it's fixed and the kettle's on again: write down what went wrong, drop it in the README next to the working .uf2, and commit. Next time, the Sunday night panic is somebody else's.