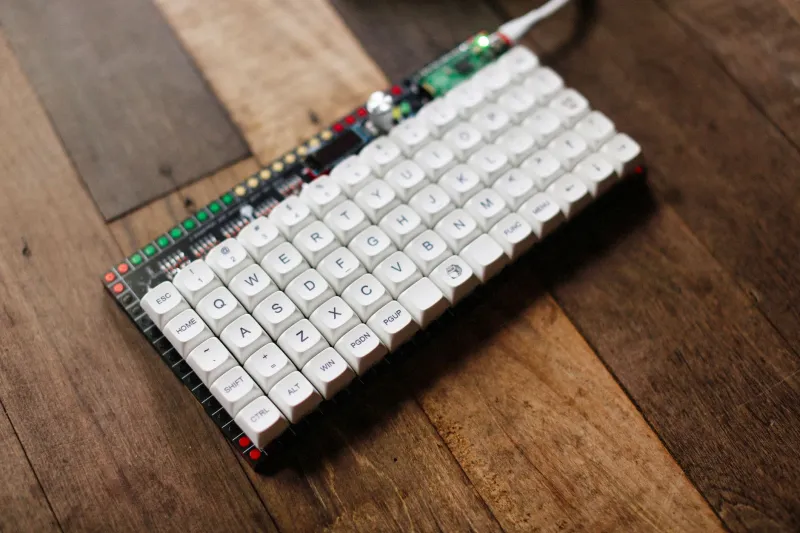
Deadening the Drum: A High-Street Parts Guide to a Rattle-Free Keyboard Case
Photo: tony_duell, CC BY 2.0, via Wikimedia Commons
There is a particular sound a cheap aluminium case makes when you type: not a clack, not a thock, but a sort of trapped bongo. It is the noise of air moving around inside a box that was designed to hold a PCB, not to sound good. You can spend a fortune chasing better switches, but if the case is ringing like a biscuit tin, you are only ever going to get a fancier biscuit tin.
The good news is that case damping is one of the few keyboard jobs where a trip to a British hardware shop can genuinely transform the result. No group buy, no six-week wait, no mysterious foam cut to a shape that never quite fits. Just measured layers, a bit of patience, and a willingness to listen before and after.
First, diagnose the drum
Before you buy anything, record a short typing test on your phone. Put the phone at the same distance each time, type the same paragraph, and keep the recording. Then tap the empty case — or the assembled board — with a knuckle. A hollow case often has a distinct ring around 150–300Hz, plus a higher rattle from loose parts. If the knuckle test sounds like a plastic tub, damping will help. If it sounds tight and dull already, you may be chasing switch or stabiliser noise instead.
A useful before-and-after comparison is not 'better' versus 'worse'. It is specific: the ring on the spacebar disappears; the case no longer hums when you bottom out; the whole board sounds shorter and more controlled. That is what you are listening for. Not silence — control.
The materials that actually work
You do not need exotic acoustic foam. The best case damping is a combination of mass, absorption and decoupling, and most of that is available on a high street or from a trade counter.
Silicone putty or mouldable silicone. This adds mass and absorbs vibration. It is excellent in the bottom of a case, especially around the centre where large panels resonate. Buy a tub of two-part mouldable silicone from a craft shop or online, but check the cure time and smell. Some putties are messy and permanent; others are removable. For a first attempt, removable is kinder.
Neoprene sheet. A 2–3mm neoprene sheet from a craft or DIY shop makes a good decoupling layer between the PCB and the case. It is dense enough to kill some ring, soft enough not to press on components. Cut it slightly smaller than the cavity so it does not bunch up when you close the case.
Closed-cell foam. Screwfix and Toolstation sell closed-cell foam mats and strips for insulation and floor underlay. Avoid open-cell sponge, which crumbles and holds moisture. Closed-cell foam is predictable, cheap and easy to cut. A 3–5mm layer under the PCB and a thinner layer in the base is often enough.
Washers and O-rings. Tiny nylon or rubber washers under the case screws can stop metal-on-metal contact and reduce the transfer of vibration into the desk. Do not overtighten. A little thread-locker is better than brute force.
Butyl or bitumen pads. These are heavy and effective, but they can be sticky, smelly and permanent. Use them only on metal cases where you are sure you will not need to remove them, and never near a wireless battery or charging coil.
Before and after: what changes
A typical hollow 65% aluminium case before damping has a bright, ringy top end and a long tail on every keypress. After a 3mm closed-cell foam layer under the PCB, a 2mm neoprene sheet in the base and four nylon washers at the screws, the same board sounds shorter. The spacebar loses its metallic edge. The case still resonates, but the resonance is lower and less annoying. It feels more solid under the hands, too, because the mass has gone up and the panels are less free to move.
A plastic case responds differently. It often benefits more from mass than from absorption. Silicone putty in the base and a foam layer under the PCB can turn a cheap tray-mount case from hollow to dull in the best way. Do not overfill: if the case bulges or the PCB flexes, you have gone too far.
UK shopping list by case size
For a 60% or 65% tray-mount case, you need roughly one A4 sheet of 3mm closed-cell foam, one A4 sheet of 2mm neoprene, a small tub of removable silicone putty, and a pack of nylon washers. Screwfix and Toolstation cover the foam and washers; Hobbycraft or Robert Dyas covers neoprene and craft silicone. Budget £15–£25.
For a 75% or TKL case, buy two A4 sheets of closed-cell foam, one A4 sheet of neoprene, and a larger tub of putty. The extra cavity area matters. Budget £20–£30.
For a full-size or thick aluminium case, add a second foam layer and consider butyl pads only if the case is permanently yours. Budget £30–£45. Avoid buying pre-cut 'acoustic kits' unless you know the case revision — a generic kit can block screw posts or ports.
Safety and warranty pitfalls
Damping is reversible only if you keep it reversible. Check your warranty before you open the case. Many UK retailers treat case opening as user damage, and a sticky silicone spill will not help your claim. If the board is wireless, keep all damping materials away from the battery, antenna and charging coil. Do not cover ventilation holes. Do not trap wires between foam layers. And do not use any material that sheds conductive fibres or dust near the PCB.
If you are unsure, start with washers and a single foam layer. Type for a week. Then decide whether you need more. The goal is a keyboard that sounds intentional, not one that looks like it has been packed for a house move.
The final clack
Case damping is not a magic wand, but it is one of the highest-value jobs in the hobby. A tenner of foam and a free afternoon can make a budget board feel considered. Measure, cut, listen, and stop when the drum goes quiet. Your neighbours — and your ears — will thank you.